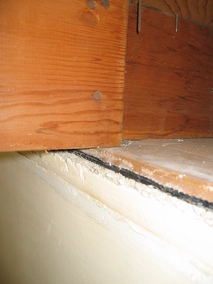
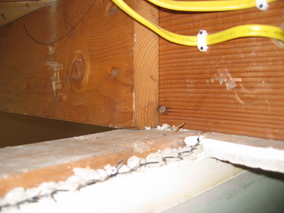
After a weekend of traveling when we didn't work on the house, we are
back to replacing old wiring and hunting down any more
mystery boxes buried in the walls.
There are just two circuits left, but they cover most of the second
floor outlets and lights, the front porch light, front entry light,
living room ceiling fixture, and an outlet in the living room. Three
of the outlets on the second floor are in the exterior brick wall, so
those will be fun (though I have been successful getting the wire out
of others like them, so I think we can get these last three as well).
At first, I thought we could do some limited demolition and just replace
the wires in the second bedroom so we could move ahead with finishing
that room. So I spent some time making more holes in the second
bedroom (sorry, no pictures). Unfortunately , these last two circuits
go everywhere, and I just couldn't see any reasonable way of getting
new wire in the second bedroom without also putting holes in the master
bedroom, second bathroom, and maybe the master bath, we finally
decided to just just go ahead and put holes wherever they are needed to
fix all the wiring. So we spent the rest of the afternoon moving
furniture out of the living room and into the not-quite-finished den.
Today we continued our rewiring adventure by opening up some holes in
the living room walls and ceiling.
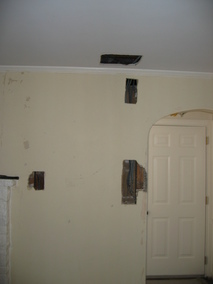
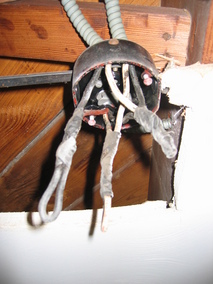
We didn't get too far before we made our first discovery. Unlike the
other boxes we found, this one was not full of newspaper and plaster,
but had a proper cover and was buried in the living room ceiling when
the house was constructed. Note that it is completely behind the
wallboard that serves as a base for the plaster. Apparently this was
a change order and they decided that running new wire was too much
trouble or not worth the extra money. Hmm.
In the second picture you can see that the wires were just looped and
taped together. I guess it was ready for a ceiling fixture if anyone
wanted to dig the box out (and could remember where it was). There
was another box just like this at the other end of the living room.
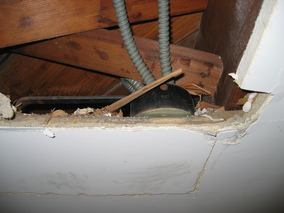
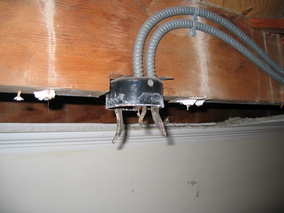
Here is a picture of the one box that was used for a ceiling fixture.
Note the nice installation job. Apparently they decided it was better
to notch the joist rather than move the box over a couple of inches.
This box is in a joist that is a few feet shorter than the main span
of about 14 feet, but then that would make the 2x8 joist just about
adequate if it had not been notched. I mean really, would anyone have
noticed if it had been three inches farther out from the wall?
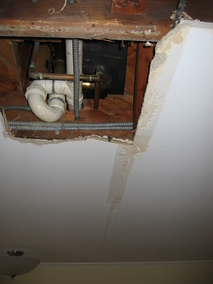
We also confirmed our suspicion about why the living room ceiling was
cracked (just by itself, the notch shown above was probably not enough
to cause a serious problem). The reason? Damn plumbers!
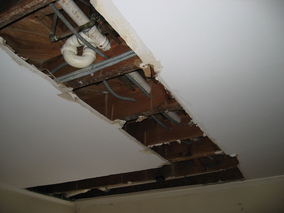
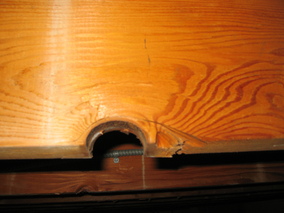
The first picture below shows the drain and trap from the master bath.
The master bath was a remodeling project (probably from the seventies,
judging from the color of the fixtures). If they could have only
moved the tub 8 inches over. Instead, they notched the 2x8 that was
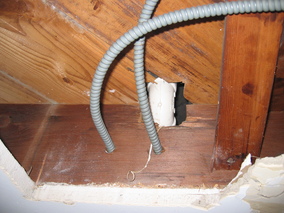
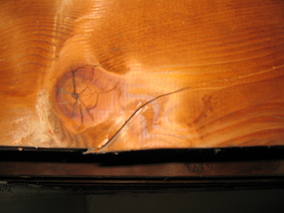
already too small for the 14-foot span. The second picture shows the
notch they made in the adjacent joist for the drain line from the
attic bedroom. This one probably could have been avoided with a
couple of 45-degree elbows, or by running it up in a different wall.
But I guess it was easier to break the floor.
Here is an overall view of the hacked in plumbing. There were only two
joists that were notched, but that was enough. Of course they were
adjacent, notched almost exactly in the middle of the span, and under
a bathtub (fill it and put a person in it and that's an extra 400
pounds or more right at the point of maximum bending stress in the
beam).
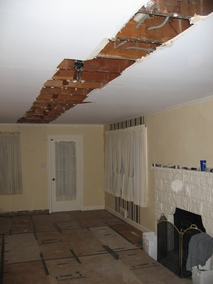
Since we were planning to remove the living room ceiling anyway to fix
the joist problems, we decided to go ahead with removing it now before
doing the wiring. We don't have a dumpster yet (I guess that will be
next weekend), so we only opened up a line down the center of the room.
This will allow us to inspect the joists and give us a starting point
for removing the rest of the ceiling.
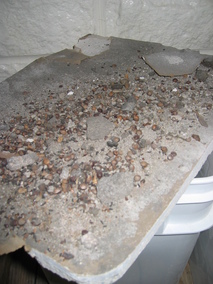
There was a surprising amount of plaster and, in some places, evidence
that mice had been living in the living room ceiling at some point.
Ugh.
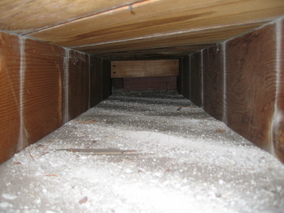
Since this makes such a mess when the plaster is pulled down, I used
the shop vac to clean some of it up. Maybe the next bit of demolition
will be a little cleaner. Note the lines of fine dust on the joists
at the gaps in the subfloor. That's 60-plus years of dust filtering
through the floor.
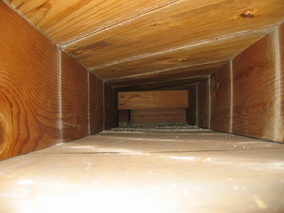
It may be hard to see here, but this joist is cracked and flexes
noticeably when someone walks on the floor above it.

When our house is just a hole in the ground, I will be able to tell
you that there was precise sequence of events and a logical action to
be taken at each step along the way that resulted in the implosion,
but I'm not sure any of it will make any sense at that point, nor will
it be clear why we couldn't see an alternate path that would have
preserved the nice house we once had while still doing the (surface)
remodeling we wanted to do.
If they even noticed, I suppose most people would have just said
something like
Hmm, the floor is a little bouncy in our bedroom. Oh well, I guess
it's just an old house.
and left it at that. But not me. I'm cursed by wanting to fix things
that I know are not right.
Tonight we removed the crown moulding and the curtains in the living
room in preparation for removing the plaster tomorrow.
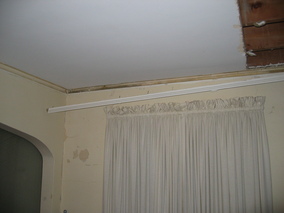
Say goodbye to the living room ceiling.
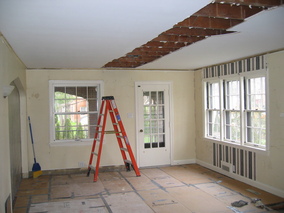
Amazingly, these two pictures were only taken about 90 minutes apart.
I really thought it was going to take much longer and make a much
larger mess.
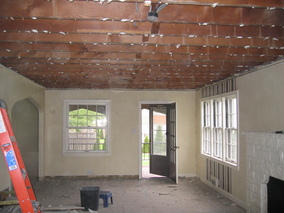
Not that I really want to become an expert at this chore, but I think
I may have found the key. The plaster in our house is is on top of
some thin wallboard that is about 16 inches wide. Working along the
strips of wallboard it is easier to remove large chunks. As long as I
didn't drop them (oops) I managed to get most of the ceiling down in
three to four foot long sections.
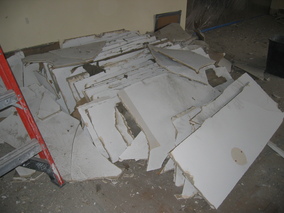
A few hours later and we had all the nails pulled out and the plaster
moved out to the garage where it awaits a visit from our friend who
removed the other rubble
from our driveway last fall. Even though we'll have to handle all
this debris twice, I'm glad we didn't order a dumpster since we
wouldn't have come close to filling it.
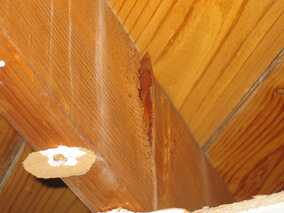
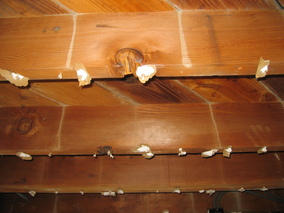
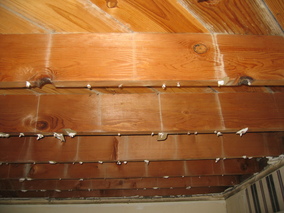
Now that the ceiling is down, we can really begin to see that our
bouncy floor problem is due to more than just the
damn plumbers.
There are a surprising number of knots in the joists in really bad
locations along with various other splits and cracks.
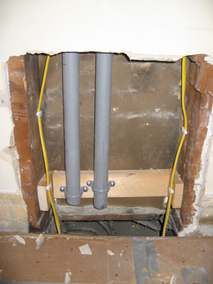
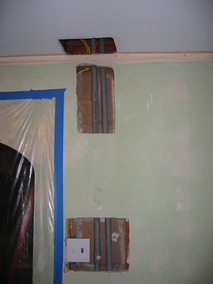
By the end of the day I managed to get some conduit run up to the
second floor and the attic for later use (when, with some luck, these
walls will no longer be quite so open).
I spent most of the day today pulling out old wires and pulling in new
(sorry, no pictures). By the end of the day, we had lights back in
the master bedroom and both bathrooms.
Halfway through all of this, we had a minor plumbing emergency as a
leak developed under the sink in the master bath after I somewhat
ungraciously pulled a board down that had been used as a support for
the pipes. Said board had just been resting on the plaster of the
living room ceiling, so after the ceiling was down, it was just
hanging from the pipes. When I pulled it down, I disturbed the
already rotten shutoff valves under the sink in the bathroom. I
thought the leak was just from threaded fitting, so I (stupidly)
decided to try to tighten it without shutting off the water. Oops.
The damn thing broke off and I had water spewing everywhere. At least
we have good shutoff valves now, but they are in
the basement.
With very little effort I also managed to break it the other valve
while removing it, so I guess we were just lucky that these valves
didn't break off all on their own.
In preparation for the upcoming joist sistering job, I purchased a
framing nailer and these toys.

The compressor was packaged with a finish nailer, brad nailer, and
stapler for not much more than I might have spent for a compressor
alone, so how could I resist?
I ordered them all from Amazon last Friday afternoon and opted for free
shipping on the compressor kit (no such deal on the framing nailer
since it is being sent from an Amazon partner). The projected arrival
was as late as May 1, but it arrived today (Monday). I guess I lucked
out that it was shipped from Harrisburg, which is only a few UPS
Ground hours away.
The framing nailer hasn't arrived yet, but if it is here by Friday
then I can start beefing up the floor next weekend.
The framing nailer arrived Friday afternoon, so we sistered some floor
joists today. We started at the far end of the living room. The
living room floor is framed with 2x10s and we are only trying to move
one ceiling 2x8 at a time, we didn't brace the floor below but
ganged three 2x4s together to spread the load. The ceiling wasn't
sagging much either, which made this a fairly easy job.
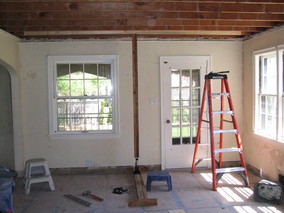
First one is up.
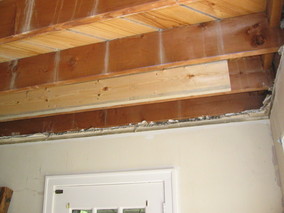
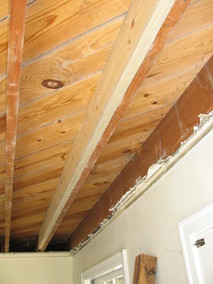
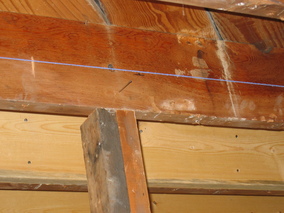
I did most of this work solo using the following method. First, I put
some marks at each end and in the center of the joist, three inches up
from the bottom edge. then using a line and the jack, I tried to move
the center up even with the ends (usually the sag was only around
1/4-inch).
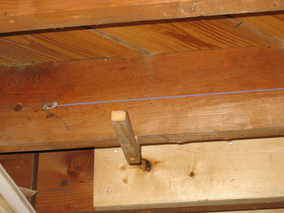
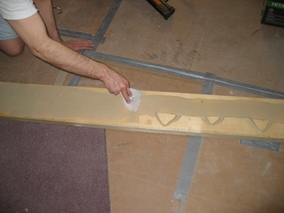
I put plenty of glue on each of the new 2x8s. I used almost half of
one of these big tubes of liquid nails on each one. Is that too much?
My guess is they will be stuck together forever.

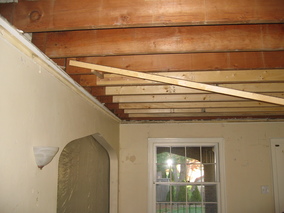
Next, I used a short helper at one end of the joist to place the sister
joist.
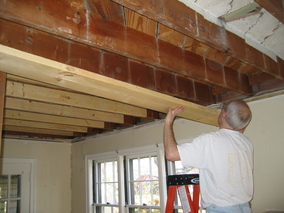
Then I clamped it in place and nailed it. Oh yeah, this other little
yellow helper came in really handy.
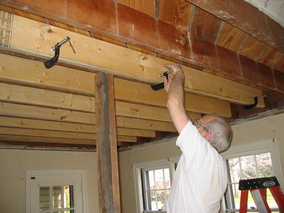

I managed to hang ten today. There are three left to go before we
get to the part of the room where we will have to deal with plumbing
to install any more. I should easily be able to get those three done,
but it will be a little more work to do the rest.
The good news is that the bedroom floor is much more solid than
before. To shake the floor now you have to jump. Before, all you had
to do was walk across the room.
I sistered another three joists today. We can't do more until we
remove some plumbing.
I also did a little work with the tiller and smoothed out another
section of the back yard and planted some grass. Here's hoping it is
green soon.
I removed the rest of the plaster bits that were left hanging
around the perimeter of the living room ceiling. It took almost as
long to clean this last bit up as it did to remove the entire
ceiling.
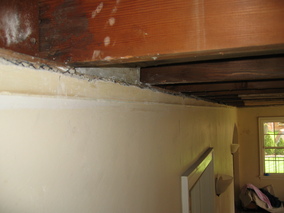
I wasn't completely satisfied with the bedroom floor, and since it
will be a lot harder to do anything about it once the drywall is up, I
put some more boards under the bedroom. Now five joists have been
tripled with one new board on each side of the original. I did this
for every other floor joist under the master bedroom, which also
happened to be the joists with the most damage.
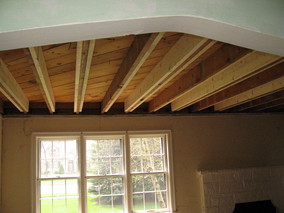
These added boards help, but the improvement is not nearly as great as
what we got going from one to two. I'll probably also triple the rest
of the ones that are most damged under the bath and stop there. So
I have about nine more boards to hang, but most require removing some
plumbing to get them installed. Maybe next weekend, though I doubt
that I will be able to get them all installed and have
the plumbing put back together until at least the following weekend.
It's a good thing we have a second bathroom.
Here are some shots that show just how little the original boards
overlap the center wall of the house. They are nailed to the
boards from the other side which actually do reach across the wall by
a couple of inches. But, yikes! On the other hand, it is been
standing just fine for 60-plus years now. And western PA is not known
as a big earthquake area.
