We removed the rest of the wallpaper from the second floor hallway (no
more stripes!) and the closet in the second bedroom.


The closet was a bit of a mess. There were two layers of wallpaper on
the walls and ceiling and we found some moldy/mildew spots
along with a substantial crack in the plaster.


At least the spots cleaned up with the detergent solution we've been
using to remove the glue.

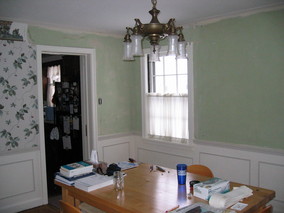
We spent most of Saturday afternoon removing the paper in the Dining
room and cleaning the walls. We also removed the large mirror that
was mounted on the wall, which left a big dirty spot. In the second
picture, you can see the difference a little detergent makes. Hmm,
that shot also shows off the cracks in the paint pretty well.


This paper was a little harder to remove, but with some patience, it
was possible to get large sections of the top layer of the paper to
come off. On the plus side, the glue was harder to get off the wall
too.

Here are Some after shots. Our current plan is to remove the wall
that still has paper, so there's not much point in stripping the rest
of that wall.


While cleaning the last of the glue from the living room walls, I
found this outlet box full of lint, dust, and cat hair. Ugh. This is
one of just two or three outlets that have not been replaced yet.

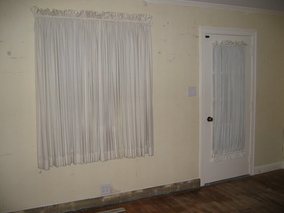
Finally, clean walls! You can also see that I've removed a bit of
base trim. The piece I removed next to the door is on one of the
outside walls that is brick and tile construction. I had no idea how
these trim pieces were attached to the outside walls (glued? nailed
to the plaster? stuck on with chewing gum?) and I was worried that
I wouldn't be able to remove them without destroying them. But
fortunately, they are just nailed in with standard finish nails which
pulled out fairly easily and felt like they were driven into wood. So
I think there is a nailing strip or some nailing blocks embedded in
the wall. I'm hoping it is a strip, but I will have to do some more
exploration to know for sure. The good news is that there is no glue
involved, so it looks like we will be able to remove the base trim,
clean it up, and move it to the den (we have some crazy plans for
raised-panel wainscoting in the living and dining rooms).


I just can't resist doing a little demolition. Today I pulled the
faux-panel trim and chair rail off the walls in the dining room. The
first picture shows the wall between the dining room and kitchen where
a heating vent was covered with some masonite. The rest of the
half-round trim pieces were stuck directly on the plaster with very
short nails and paint. The chair rail was nailed to the wall (plaster
on brick) with large hardened-steel concrete nails.


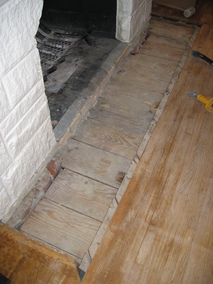
Later, I tackled the removal of the ugly tile hearth and the sand,
gravel, and cement mixture they were sitting on. All of this material
was installed in a well about three to four inches deep. Most of it
had to be chiseled out, which made quite a mess. About a third of the
way through, there was some doubt about whether I would be able to get
it all out without breaking something or maybe going through the floor
to the basement. In the end, it was just another job that initially
seemed easy, then impossible, then merely a minor PITA.


Almost done. This last bit was the worst, pretty much like solid
concrete.

All cleaned up. Now I just have to decide how to frame this so that a
layer or two of concrete backer board plus tile will match the level
of the surrounding wood floor. In the lower part of this picture you
can also see that there was a border around this opening made with two
floor boards, mitered at the corners. I'm thinking of replacing it
with a single wide strip, possibly something other than oak. I'm not
sure whether a lighter or darker color wood would look better. Hmm.

I didn't get much work done on the house today, but I did manage to
pull the nails out of the salvaged trim boards and strip a small piece
as a test. It looks like it will clean up easily with a heat gun and
a little sanding. These are just pine or fir boards, so we'll be
painting them again. I'm only stripping them because the paint was
layered on a little thick and uneven, and there were bits of carpet
stuck to the paint. I guess that the carpet guys didn't wait for the
paint to dry, or the painters didn't bother to mask to carefully.
Either way, getting a good paint job would be hard without doing some
cleanup.

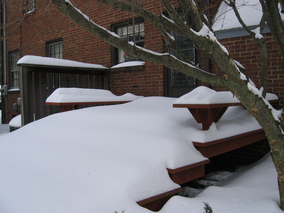
Back on January 15, the high was 55F, and up until that day, we had
only had four days with highs below freezing and the chance of having
much winter at all seemed somewhat in doubt. Since then, we have only
had four days with highs above freezing (33F, 34F, 33F, and 37F), and
now we have a foot or so of snow on the ground, so yep, it's
definitely winter.


After hacking a path to the back door (sorry, no after picture, so
you'll have to believe me when I say that I actually did make it
possible to open the door), I spent some quality time with my trusty
heat gun.


As reported earlier it cleans
up pretty easily just using the heat gun and a scraper, but it still
took around four hours to do this much of it:

Hmm, is it worth it? Maybe. Anyway, this is already enough for the
den and I still have a few more pieces to recover from the living
room. Next I'll have to do a little sanding, then prime and paint.
But before I can install these, we need to refinish the floors in the
den and second bedroom. Oh wait, before we do that, we need to remove
the trim and repair and paint the walls and ceiling in the second
bedroom, but before we can finish that project we need to do a little
electrical work in the second bedroom (which will put holes in the
walls and ceiling). It's always something.
I removed the moulding from the second bedroom today. The baseboards
will be stripped and reinstalled. We'll be replacing the top rail
with something, but we're not sure what yet.

I confirmed that there is a wire snaking around the studs, so this
will have to be fixed.

But I found that on the exterior wall, where I thought there was a
wire running just under some joint compound and behind the baseboard,
the wires were actually running in the wall. It turns out that there
is a substantial gap between the tile wall of the house and the
exterior brick veneer. I don't know yet whether that's true
everywhere in the house, but here there is a gap of about two inches.

I spent some more quality time with the heat gun today and stripped
the baseboard moulding that I removed from the second bedroom. Sorry,
no pictures. But really, it just looked a lot like
this.